CLI Service
Using the Binary
Inside a Vue CLI project, @vue/cli-service installs a binary named vue-cli-service. You can access the binary directly as vue-cli-service in npm scripts, or as ./node_modules/.bin/vue-cli-service from the terminal.
This is what you will see in the package.json of a project using the default preset:
{
  "scripts": {
    "serve": "vue-cli-service serve",
    "build": "vue-cli-service build"
  }
}
You can invoke these scripts using either npm or Yarn:
npm run serve
# OR
yarn serve
If you have npx available (should be bundled with an up-to-date version of npm), you can also invoke the binary directly with:
npx vue-cli-service serve
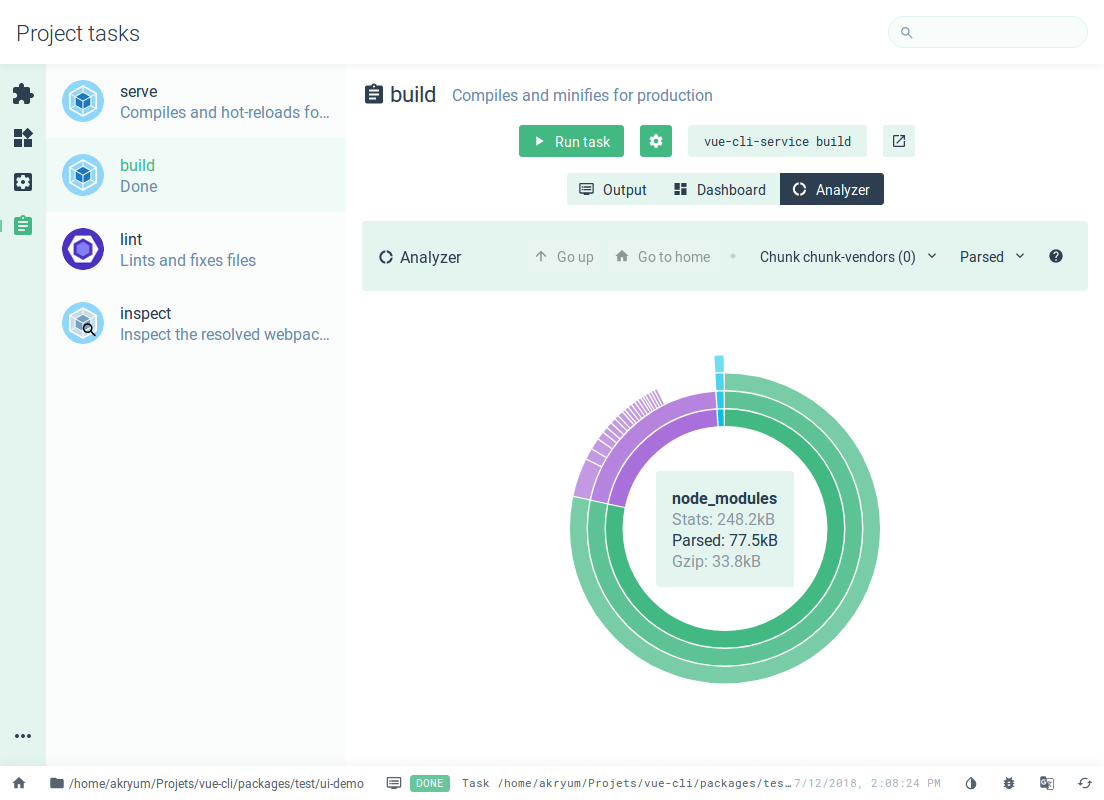
You can run scripts with additional features using the GUI with the vue ui command.
Here is the Webpack Analyzer from the GUI in action:

vue-cli-service serve
Usage: vue-cli-service serve [options] [entry]

Options:

  --open         open browser on server start
  --copy         copy url to clipboard on server start
  --mode         specify env mode (default: development)
  --host         specify host (default: 0.0.0.0)
  --port         specify port (default: 8080)
  --https        use https (default: false)
  --public       specify the public network URL for the HMR client
  --skip-plugins comma-separated list of plugin names to skip for this run
--copy
Copying to clipboard might not work on a few platforms.
If copying was successful, (copied to clipboard) is displayed next to the local dev server URL.
The vue-cli-service serve command starts a dev server (based on webpack-dev-server) that comes with Hot-Module-Replacement (HMR) working out of the box.
In addition to the command line flags, you can also configure the dev server using the devServer field in vue.config.js.
[entry] in the CLI command is defined as the entry file, not an additional entry file. If you overwrite the entry in the CLI, then the entries from config.pages are no longer considered, which may cause an error.
vue-cli-service build
Usage: vue-cli-service build [options] [entry|pattern]

Options:

  --mode         specify env mode (default: production)
  --dest         specify output directory (default: dist)
  --modern       build app targeting modern browsers with auto fallback
  --no-unsafe-inline build app without introducing inline scripts
  --target       app | lib | wc | wc-async (default: app)
  --formats      list of output formats for library builds (default: commonjs,umd,umd-min)
  --inline-vue  include the Vue module in the final bundle of library or web component target
  --name         name for lib or web-component mode (default: "name" in package.json or entry filename)
  --filename     file name for output, only usable for 'lib' target (default: value of --name),
  --no-clean     do not remove the dist directory before building the project
  --report       generate report.html to help analyze bundle content
  --report-json  generate report.json to help analyze bundle content
  --skip-plugins comma-separated list of plugin names to skip for this run
  --watch        watch for changes
vue-cli-service build produces a production-ready bundle in the dist/ directory, with minification for JS/CSS/HTML and auto vendor chunk splitting for better caching. The chunk manifest is inlined into the HTML.
There are a few useful flags:
--modernbuilds your app using Modern Mode, shipping native ES2015 code to modern browsers that support it, with auto fallback to a legacy bundle.--targetallows you to build any component(s) inside your project as a library or as web components. See Build Targets for more details.--reportand--report-jsonwill generate reports based on your build stats that can help you analyze the size of the modules included in your bundle.
vue-cli-service inspect
Usage: vue-cli-service inspect [options] [...paths]

Options:

  --mode    specify env mode (default: development)
You can use vue-cli-service inspect to inspect the webpack config inside a Vue CLI project. See Inspecting Webpack Config for more details.
Checking All Available Commands
Some CLI plugins will inject additional commands to vue-cli-service. For example, @vue/cli-plugin-eslint injects the vue-cli-service lint command. You can see all injected commands by running:
npx vue-cli-service help
You can also learn about the available options of each command with:
npx vue-cli-service help [command]
Skipping Plugins
Sometimes, you may want to not use a certain CLI Plugin when running a command. For example you might want to build a version of your app that doesn't include the PWA plugin. You can do that by passing the name of the plugin to the --skip-plugins option.
npx vue-cli-service build --skip-plugins pwa
This option is available for every vue-cli-service command, including custom ones added by other plugins.
You can skip multiple plugins by passing their names as a comma-separated list:
npx vue-cli-service build --skip-plugins pwa,apollo
Plugin names are resolved the same way they are during install, as described here
# these are all equivalent
npx vue-cli-service build --skip-plugins pwa

npx vue-cli-service build --skip-plugins @vue/pwa

npx vue-cli-service build --skip-plugins @vue/cli-plugin-pwa
Caching and Parallelization
cache-loaderis enabled for Vue/Babel/TypeScript compilations by default. Files are cached insidenode_modules/.cache- if running into compilation issues, always try deleting the cache directory first.thread-loaderwill be enabled for Babel/TypeScript transpilation when the machine has more than 1 CPU cores.
Git Hooks
When installed, @vue/cli-service also installs yorkie, which allows you to easily specify Git hooks using the gitHooks field in your package.json:
{
  "gitHooks": {
    "pre-commit": "lint-staged"
  }
}
yorkie is a fork of husky and is not compatible with the latter.
Configuration without Ejecting
Projects created via vue create are ready to go without the need for additional configuration. The plugins are designed to work with one another so in most cases, all you need to do is pick the features you want during the interactive prompts.
However, we also understand that it's impossible to cater to every possible need, and the needs of a project may also change over time. Projects created by Vue CLI allow you to configure almost every aspect of the tooling without ever needing to eject. Check out the Config Reference for more details.